Showing posts with label strawberries. Show all posts

Sunday, June 8, 2014

Mesclun Salad with Homemade Honey Roasted Almonds and Maple Balsamic Vinaigrette


Yuuummmm. I was mmmm mmm mmm-ing the entire time I was eating this salad. It's pretty much my perfect salad (other than say a beet salad). But I find something like this next to impossible to resist on a menu. I also find that most of the time when I make my own vinaigrette, there is something off with the flavors. Like it tastes good plain, but then I mix all the goods together and it just doesn't mesh. This is NOT the case with this salad. Some might find this salad too sweet bc of the sugar from the nuts and the maple syrup, but I thought it was the jam. My mouth is watering just thinking about it...and it's a salad....My dad and my step mom absolutely loved it too and my mom ate the leftovers directly from the salad bowl at dinner. 

Oh man check out this close up...yeah thats right. A juicy burger couldn't make my mouth water more...maybe not even a breakfast sandwich....blame it on the summer heat...or the goat cheese. I can't resist goat cheese. I just can't. 


Mesclun Salad 
about 4 sliced strawberries
1/3 cup blueberries
full bag (or more) of garden blend greens
about a ¼ cup honey goat cheese, crumbled (or regular, but I prefer the honey)
about a ¼ cup of honey roasted almonds
Maple Balsamic Vinaigrette


Maple Balsamic Vinaigrette 

Depending on the quality of your ingredients, you may want to try one or the other versions of the vinaigrette. My dad tends to have super fancy pants oils and vinegar's that are old and have subtler or stronger flavors. If that sounds more like your pantry - use this version

higher quality ingredients:
1 tablespoon good quality maple syrup
1 tablespoon balsamic vinegar
1 tablespoon aged red wine vinegar
2 tablespoons olive oil
salt to taste

more everyday ingredients: 
1 tablespoon good quality maple syrup
1 tablespoon balsamic
2 tablespoons olive oil
salt to taste

The first time I made this vinaigrette I was user more everyday ingredients, so the vinegar flavor was strong enough from the balsamic. When I made it again at my dads house like I did the first, it tasted very flat, so the addition of the red wine vinegar gave it just the right amount of zing. The higher quality/aged ingredients were thicker and almost looked like more of a dressing than a vinaigrette before I added the rwv (if you don't know what kind of ingredients you have)

Honey Roasted Almonds
1 cup sliced almonds
1 tablespoon honey
1 tablespoon water
1 teaspoon canola or vegetable oil 
¼ cup of granulated sugar 

¼  teaspoon of salt 

Bake the almonds on a cookie sheet at 350 for about 7 minutes or until lightly toasted. Heat the honey, oil and water in a sauce pan. When the pecans are finished toasted, pour them into the pan and stir until the pecans have absorbed all of the liquid. Pour the sugar and salt over the pecans and toss until fully coated. Spread out onto a cookie sheet and let dry for at least 30 minutes before breaking apart.


Monday, November 11, 2013

Decorated Sugar Cookies for Breast Cancer Education and Awareness


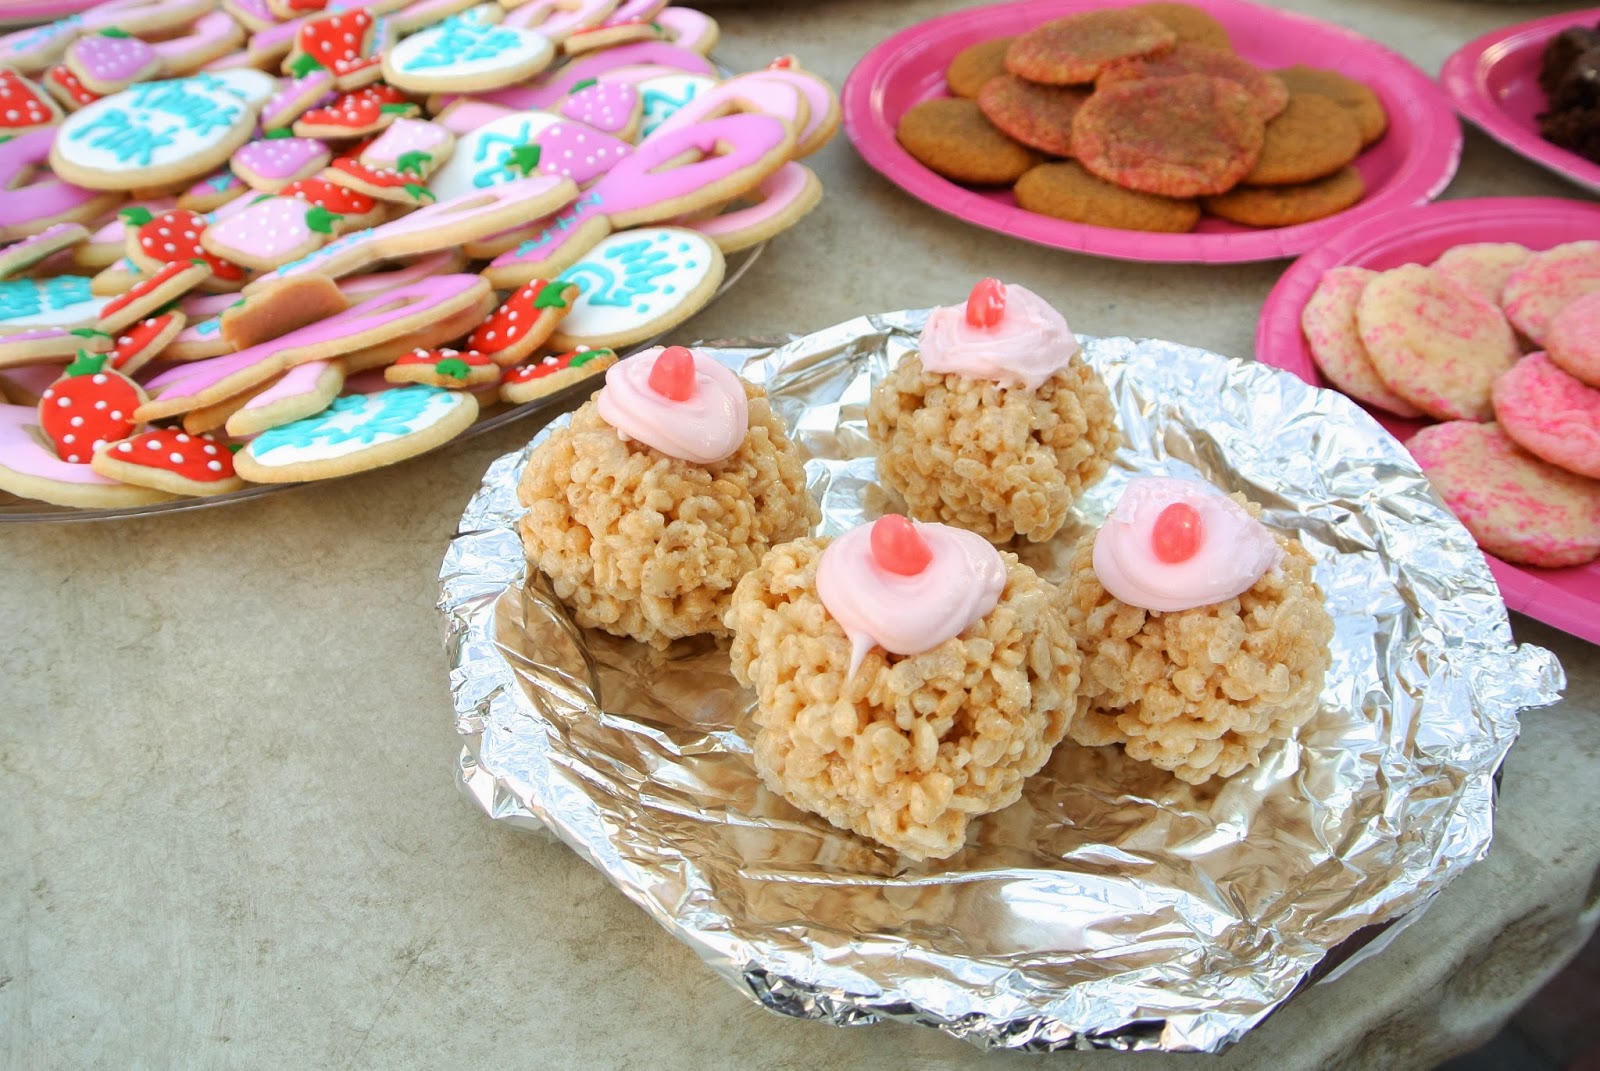
October is national Breast Cancer Awareness and Education month, so my ZTA chapter, Eta Zeta, does a bunch of profit shares and hosts a big Think Pink event every year. At the event we have tables full of baked goods, we hand out ribbons and breast exam pamphlets, have a breast cancer survivor tell their story (amazing), and have games and live musical performances by the incredible acapella groups at Elon, Sweet Signatures and Rip Chord. I love events like these because they are the perfect opportunity for me to practice my sugar cookie decorating skills. It takes a ton of work, so I need a really good excuse to take over and ultimately destroy the kitchen, and pretty much any surface area in our living room for 2 days.

Breaking the process up into 2 days (if not 3) is the best and least exhausting way to go about making sugar cookies like these (especially when you have other things to do, like, I don't know, maybe go to CLASS for example...). Day 1 is for preparing, refrigerating, cutting out and baking the cookies. It's nice to have a system worked out with cutting out, baking and cooling, because I think it is best to only bake one sheet at a time. (In an ideal situation - preparing the dough can also be day 1, baking on day 2, decorating on day 3 - with day 4 being the day of the event) Baking and decorating also produce their own unique messes, so it's good to completely clean up, go to sleep and start fresh the next day. This also guarantees that the cookies will be completely cool and ready for decorating. The cookies also get softer overnight if you accidentally over bake some. My oven is complete crap, so every batch baked for a different amount of time. I had to watch them like a hawk - while simultaneously rolling and cutting out the next batch).

This time I think I did a really good job cleaning up as I go…Not perfect by any means, but it does make the process go significantly smoother. Most recipes also say the ENTIRE process of baking, cooling and decorating takes 5 hours. like WHAT? hoowwwww. like actually HOW? Maybe I just need more practice, but that is just absurd. There is NO WAY - no way you can decorate that many cookies in that amount of time.

Rolled Sugar Cookies 
I got the recipe here and followed the advice from the comments

Ingredients
1 ½ cups butter, room temperature
3 cups of sugar
4 eggs
5 cups all purpose flour
2 teaspoons baking powder
1 teaspoon salt
2 tsps vanilla

In a medium sized bowl, mix together the flour, baking powder and salt.
In a large together, cream together the butter and sugar until light and fluffy. Then add the eggs and vanilla.

In 3 increments, add the flour mixture to the large bowl, using a spatula (not the mixer).

Either cover the bowl with plastic wrap and refrigerate for at least 2 hours, or over night. You can also separate the dough into two balls or disks and wrap in plastic wrap. (It was hard digging out the hard dough from the bowl, so I prefer doing it this way and breaking off pieces at a time)

Preheat the oven to 400 degrees. Lightly flour your work space and rolling pin and roll out the dough to about ¼ to ½ inch thickness. Cut out shapes with a cookie cutter and place on a silpat or tin foil (I rotate between the two because I only have one silpat)


If your oven maintains a consistent temperature, bake for 6 to 8 minutes – making sure the edges don’t get too brown. A faint brown edge is ok, but maintaining a light tan color is preferable.  Cool completely.

For my decorating icing I use this recipe from Sweetopia, but I add a teaspoon or so of almond extract to tone down the strong flavor of the confectioners sugar. Also, in order to write words on the cookies without too much spreading (everything in turqoise), I put some icing on research and added an additional teaspoon of meringue powder. These were very cute, but the mouth feel wasn't the best because it was harder - so I wouldn't go overboard.


These little strawberries were my favorite! Strawberries are one of zeta's national symbols, so I thought it would be a cute way to tie together Breast Cancer Awareness and our sorority (well fraternity actually…). At first I was afraid not making them all red was a dumb decision, but I'm so glad I didn't. They were so small and popable, and surprisingly weren't hard to decorate either considering there were so many of them. I'll definitely be making these again!


Think Pink
me (and very little sleep) and MY LITTLE, Jessica (well one of my littles….) 
Everyone in our chapter brought one of their bras as decoration - SO CLEVER
Laura and her bedazzled black bra (costume purposes only, of course) 
The all girls acapella group at Elon, Sweet Signatures. They were amazing!
The cookies in action
I just loved these too much - Rice Krispy Boobs!


Sunday, July 22, 2012

Whole Foods Chantilly Cake


My lovely sister, Melanie, was home for about two weeks over 4th of July week (weird how it wasn't week-end). We also got to celebrate her birthday too, which she apparently hadn't celebrated at home for about 6 years. Since I went to boarding school and then to college, I know exactly how that feels, it I knew it was special that she got to finally celebrate at home with her family. Since I almost always bake something when I go to my grandmother's house and it was also Mel's b-day, I thought this would be the perfect time to bake a cake.

There is no comparison to the Whole Foods Chantilly cake. It is simply fantastic. Sold by the heavenly slice, this cake is exceptionally moist and the most incredible frosting. So naturally, my instinct was to try and make it myself. And I must say, it came out pretty damn good. The cake wasn't as moist, but I'll probably play around with that recipe a bit more before it's perfected. The Chantilly cream frosting however was sensational. I mean, anything with both cream cheese, whipped cream, AND mascarpone has got to be amazing (which it was).

.....I also admit being lazy when I took these pics, and thus I really don't think they do the cake justice. It was delicious and I definitely will be making it again. Maybe I'll have a DSLR camera and I'll finally get accepted onto foodgawker....(yeah right) but a nerd can dream, right? 


Whole Foods Chantilly Cake 
What you will need: 
Simple yellow cake recipe (I used THIS ONE)
Chantilly cream frosting
Macerated strawberry/raspberry puree  
Apricot fruit glaze (or just thinned and microwaved apricot jam)
strawberries 
blackberries
raspberries 
blueberries 
strawberries 

Chantilly Cream Ingredients
8 oz container cream cheese, room temp
8 oz container mascarpone cream cheese, room temp
1 cup confectioners sugar
2 cups heavy whipping cream
1 teaspoon almond extract

Berry Sauce
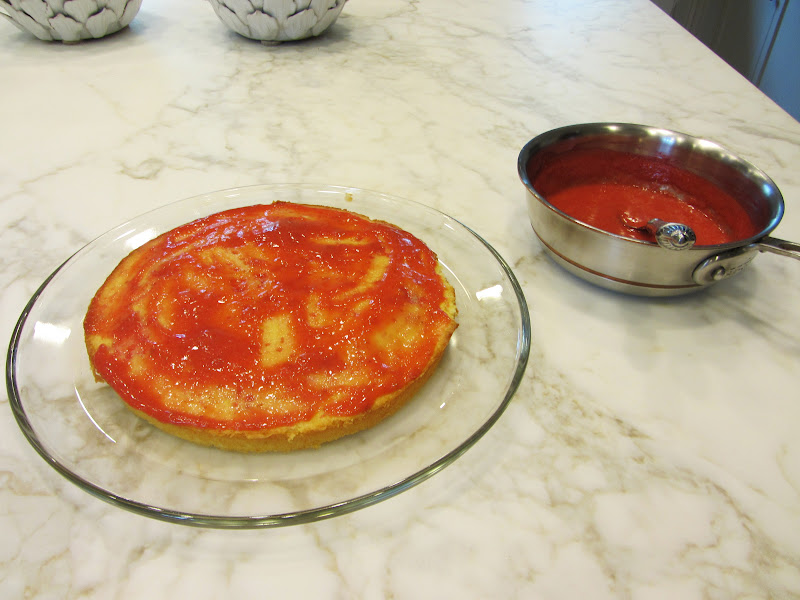
Blend together strawberries and raspberries (or just raspberries. I didn't have enough so put strawberries in there too).  In a small sauce pan over medium low heat, add the berry puree and 1/4 cup of sugar. Let this sit for about 5 or so minutes until you think the sugar has disolved into the puree.

Directions
1. Whip the cream cheese, mascarpone and confectioners sugar together until light and fluffy.


2. In a separate bowl, whip together the heavy whipping cream and almond extract until stiff peaks form. Make sure not to over mix because it will become grainy and change the texture and appearance of your frosting. 


3. Gently fold the whipped cream into the mascarpone cream cheese mixture until fully incorporated.

 The next steps I show you how to assemble the cake. I think the pictures are pretty self explanatory. Read the captions for more details about each pic


Let the sauce sit and soak in for a bit. I think this adds a bit of extra moisture to the cake
Spread a generous layer of the frosting on top of the sauce. With the spatula, make the outer rim of the frosting higher than the center so the fruit and sauce stay in the center of the cake rather than spill out the sides when you add the top layer of cake.
This is the crumb coat before the second coat of frosting. This is crucial for a smooth finish on your cake. The key is to not let the spatula touch the cake during round 2 of frosting. (for the crumb coat, you do)
Now the fun part - arrange your fruit! I cut the kiwi's in half. I also started with the biggest, aka the strawberries, and gradually worked my way down to the smallest (the blueberries)
Mel tryin to sneak a taste before we dig in. No one wanted to sing. LAME


Slice...
Serve!

Thursday, July 7, 2011

Fruit Tart

A Patriotic Fruit Tart for the 4th of July


The Crust 
Ingredients

1 1/4 cup all purpose flour
2 1/2 tablespoons of sugar 
1 stick of unsalted butter, cold and cut into small cubes
1 large egg yolk
2 tablespoons of ice water (plus more if needed) 

Even though these directions seem really long, don't be intimidated! It's actually a lot easier than it sounds. 

1. In a food processor fitted with a dough blade, combine the flour and sugar. Then add the butter and pulse until the mixture resembles course meal. In a separate bowl, whisk together the egg yolk and water. Add the egg water mixture to the flour mixture and pulse until just combined. Continue to add more ice water, but just barely so until the dough has formed a large ball. Remove the dough from the food processor, flatten into a disk and cover in plastic wrap. The dough should be refrigerated for about 30 minutes to an hour. 

2. With a rolling pin, roll out the dough on top of plastic wrap into a large circle. Place the dough circle into a large tart pan with a removable bottom. Press the dough into the pan (with the plastic wrap still on). Only remove the plastic wrap when the dough is firmly stuck to the pan with no air bubbles.  Preheat the oven to 375 and refrigerate again for at least another 30 minutes. 

3. After the crust has become relatively firm from the fridge, make small indentations with a fork at the bottom of the crust so air can get through and the crust doesn't puff up too much when baking. Remember to place and spread out either cheese cloth or parchment paper as well as beans or pie weights so the crust doesn't puff up while baking. *note* this cannot be excluded. Your crust will be unusable you don't have something to weigh it down.  
4. Bake the crust with the weights for about 25 minutes or until the edges have become golden brown. Remove the wights, lower the temperature to 350 and continue baking for about 5 minutes. Let the Crust completely cool before use (sometimes it is even better to refrigerate it first) Also do not remove the crust from the pan until you are ready to serve. The pan keeps it from falling apart and makes it easier to travel with. 

The Custard or "pastry cream"
Ingredients

1 cup whole milk
  1/2 cup sugar  (separated into 2, 1/4 cup)
3 large egg yolks 
1 tablespoon cornstarch 
1 tablespoon flour (preferably rice flour for lightness) 
2 tablespoons unsalted butter
 
    Directions
    In a saucepan, combine milk and 1/4 cup of sugar until it starts to simmer. In a separate bowl whisk together the egg yolks, cornstarch and remaining 1/4 cup of sugar. Pour about 3 tablespoons of the hot milk mixture into the egg yolk mixture, stir well and then pour back into the sauce pan. stir constantly until the custard thickens (which happens pretty quickly). Transfer the hot custard to a bowl, add the butter and blend for about 5 minutes until the butter is completely melted and the custard has cooled. Get some plastic wrap and cover the creamy goodness, pressing the wrap tightly against the sturd so there is no air (prevents a gross filmy layer from forming). pop that sucker in the fridge for at least an hour before pouring into the crust.
    when the custard is ready to be used, blend it with the blender again to get out any lumps that may have formed while in the fridge.

    Glaze
    Ingredients

    1/8 cup water
    1/4 cup sugar
    teaspoon lemon juice

    Directions (this is the easiest part!)
    In a microwave safe bowl, combine the water sugar and lemon juice. In minute long incriminates microwave and stir until the sugar has dissolved. and that's it actually. Then just take a pastry brush after the simple syrup has completely cooled and lightly cover the fruit (once everything has been assembled on the tart). Don't over glaze. This particular stuff is pretty runny and tends to leak if you are traveling. I tend to drive like a maniac and it leaked everywhere (mostly on me) when I brought it to my Mimi and Big Daddy's house for the 4th. like actually errwhere is was a sticky mess wherever that tart went. but it definitely was pretty - and delicious. (the pictures don't do it justice at all)