Showing posts with label homemade ice cream. Show all posts

Tuesday, May 6, 2014

Maple Oatmeal Raisin Ice Cream


At Elon we have a local ice cream placed called Smitty's that makes a killer oatmeal ice cream. So of course, immediately upon tasting it for the first time I knew I had to try and make it at home. I also happen to have developed an oatmeal addiction this year and have eaten it almost every day for breakfast since August...no idea how I haven't gotten sick of it yet, but there it is. I finally got around to making this ice cream and - i'm not exaggerating - this is hands down the BEST ice cream I have made so far. It's amazing; not too sweet, perfectly creamy and just downright dope. UGH it's just...too good. like jeez louis my mouth is watering just thinking about it. AND once again, its pretty dang easy to make too and could potentially involve ingredients that you already have lying around...apart from the heavy cream - that's a zinger. 

Also this is random, but for some reason I have never been able to make 1/3 look like ¼...why is that? It has been annoying me for YEARS. If anyone knows that the deal is with that PALEASE help a sistah out...


Oatmeal Raisin Ice Cream Base 

Ingredients 

2 cups milk 
4 tsp. cornstarch 
1 ¼ cup heavy cream
1/3 cup white sugar
¼ cup brown sugar
3 tablespoons maple syrup
¼ teaspoon cinnamon
¼ tsp. and one pinch salt 
3 tablespoons cream cheese
½ cup toasted rolled oats, lightly processed 
*sweetened raisins 

Sweetened Raisins:
½ cup raisins 
¼ cup water
2 tablespoons sugar


For the Ice Cream base: 

In one small bowl, whisk together 1/4 cup of milk and the cornstarch

Place the 3 tablespoons of cream cheese in a bowl and set aside.

Open plastic bag with edges folded over set over an ice bath

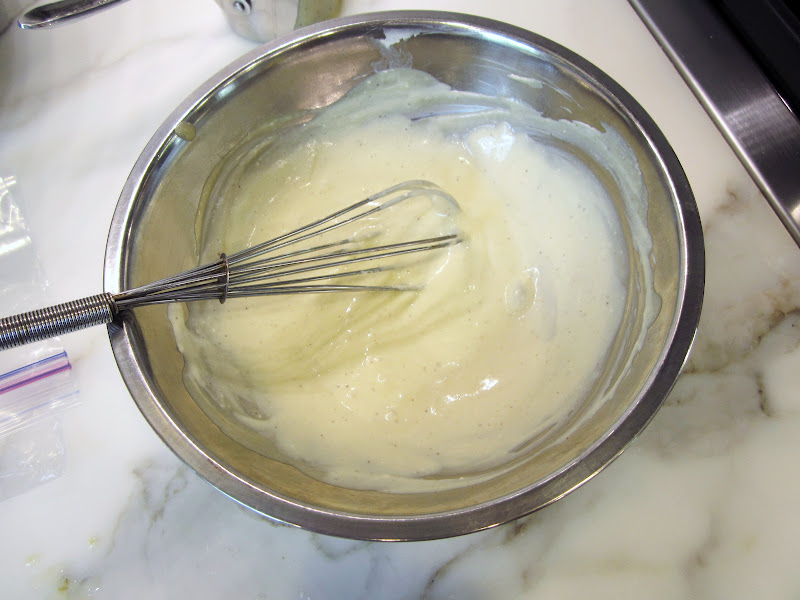
In a 4-quart saucepan, add the remaining milk, heavy cream, sugars, maple syrup and salt. Whisk together until somewhat incorporated

Over medium high heat, cook the mixture until it comes to a rolling boil. Then let boil for 4 minutes.

Pour in the cornstarch slurry and the oatmeal and mix well. Bring back to a boil and cook for 2 more minutes then remove from heat. Stir frequently so the oatmeal gets fully incorporated.

With your small measuring cup, scoop out about 1/4 cup or more of the hot mixture and pour into the cream cheese bowl. Mix very well and then pour it back into the main pot. Stir well until thick.


Pour the hot cream into the plastic bag over the ice bath. Let sit for at least 30 minutes or until completely cold. If you don't want to freeze right away, you can also put the plastic bag in your fridge for up to 3 days.

To prepare the sweetened raisins: 

Soak the water and raisins in the unheated saucepan for about 15 minutes. Add the sugar and cook over medium-low heat. Stir frequently to prevent burning, until most of the water/syrup has been absorbed - about 5-7 minutes. Remove from the heat, drain out remaining liquid and let cool. 

Freezing the ice cream:

freeze according to your ice cream makers instructions and add the raisins 2 minutes before it's finished. I had to break them apart with my hands first so they wouldn't form a big raisin clump.


Friday, October 18, 2013

Funfetti Cake Batter Ice Cream


After making the funfetti cookies from Sally's Baking addiction, I still had leftover cake mix that needed to be used. After pilfering through a couple ideas, I decided to kinda do my own thing. Especially since I had a weird quantity leftover. I definitely could have made more cookies, but I had been wanting to make ice cream for a while anyway. I had originally planned on sticking with jeni's best ice cream base and just adding the cake mix, but about a minute into the cooking process I knew that wasn't going to work out at all. Thus, I was pretty nervous about the base. When things don't go according to plan, especially with ice cream, things can easily go wrong during the freezing process. In this case, it couldn't have been better. Holy ice cream this stuff is soo good! And super rich. If I added birthday cake remix inspired ingredients from Cold Stone to this base, this thing would be out of control. I'm definitely putting that on my to-do list for next time.


Homemade Funfetti Cake Ice Cream 
Ingredients 
2 cups whole milk
1 1/4 cups heavy whipping cream (my store stopped selling normal heavy. I'm not pleased...)
2/3 cup sugar
1 1/2 cups yellow cake mix
3 tablespoons cream cheese, room temperature

Pour the milk, cream, sugar and cake mix into a sauce pan. Have the room temperature cream cheese in a small bowl whipped with a whisk and ready to go. It's ok if the cream cheese basically gets stuck in the whisk because the hot cream will eventually get it out. Heat the milk mixture over medium heat and stir constantly for five minutes. If you stop stirring, the cake will start to cook at the bottom of the pan. When the milk is hot, pour some into the bowl of cream cheese and whisk to combine. Then pour the cream cheese mixture back into the milk. Continue stirring for about a minute or two and then remove the pot from the heat. Pour the ice cream base into a place bag in a bowl placed over an ice bath. Wait until it is completely cool before refrigerating.

Add the sprinkles a minute before the ice cream is finished 


Tuesday, August 7, 2012

Pistachio Ice Cream


For this recipe I used Jeni's best Ice cream base and then added my own pistachio paste that I ordered off of amazon. Pistachio paste is what we used at sucre to make the pistachio ice cream, so I thought buying it would be the simplest way rather than making the paste myself. It's also a lot cheaper than buying and blending them yourself, which would probably cost at least 20 big ones. I bought this one, and I also had a lot left that I can use for other things (like a chocolate pistachio tart perhaps?) I also thought it would provide the most pistachio flavor, because some recipes just soak the pistachios in the base during the cooking process and then strain them out, which doesn't leave an amazing color or texture like the paste does. I think it came out great, but it was also super rich. You couldn't eat an entire cup of this even if you tried. well...at least I couldn't...


Homemade Pistachio Ice Cream 
This recipe is pretty much the same as the vanilla bean recipe from the previous post, however in this one I added vanilla extract and pistachio paste instead. Adapted off of Jeni's best ice cream base.

Ingredients
2 cups milk
4 tsp. cornstarch
1 ¼  cups heavy cream
2/3 cup sugar
2 tbsp. light corn syrup
¼ tsp. kosher salt
3 tbsp. cream cheese, softened
¼ cup pistachio paste

Directions
Before you start cooking, set up your stations:

(a.) In one small bowl, wisk together 1/4 cup of milk and the cornstartch

(b.) Place the 3 tablespoons of cream cheese in a bowl and set aside.

(c.) Open plastic bag with edges folded over set over a large bowl filled with ice (the ice should melt a bit during the cooking. you can add a bit of water to it later if it isn't ice bath ready by the time you are ready to cool your ice cream)

(d.) In a 4-quart sauce pan (at least - believe me I made this mistake and it was a hassle trying to switch pots in the middle of everything...pictures to follow...) Add the remaining milk, heavy cream, sugar, salt and pistachio paste and wisk together until somewhat incorporated (it should turn a very faint green - the color shows up more during the cooking process)

(e.) 4 minute timer ready to go

NOW you can start cooking (and this is actually the quick part)

1. Over medium high heat, cook the mixture until it comes to a rolling boil. Boil for exactly 4 minutes.


This is when I realized my pot was too small and had to turn off the flame and switch immediately....surprised it didn't make a big difference as to the cooking process. but it did take a bit for the pot itself to get hot again

2. Pour in the cornstarch slurry and mix well. Bring back to a boil and cook for 2 more minutes then remove from heat.

3. With your small measuring cup, scoop out about 1/4 cup or more of the hot mixture and pour into the cream cheese bowl. Mix very well and then pour it back into the main pot. Stir well until thick.


4. Pour the hot cream into the plastic bag over the ice bath. Let sit for at least 30 minutes or until completely cold. If you don't want to freeze right away, you can also put the plastic bag in your fridge for up to 3 days.


5. Freeze according to your ice cream makers instructions (I do it for about 25 minutes)


Tuesday, July 24, 2012

Homemade Ice Cream Sandwiches


Ever since I got my ice cream maker, I've kind of been obsessed. I've only done two blog posts so far, but I can't tell you how many times I've already used this thing. Once you fail (which you will, unless you are some kind of ice cream savant), especially a couple of times, you become obsessed with perfection. I think I finally found a fool proof, go-to base recipe that I will probably use for most of my ice creams though, so I can't start experimenting. 

When I worked at the confection studio at Sucre, I noticed we never used egg yolks. But after doing a ton of research on the web, I couldn't really find any recipes that didn't start with some form of custard (which means using egg yolks to thicken the milk, almost like making lemon curd or the filling of a berry tart if you have ever done that...) Well doing this is extremely temperamental and can go wrong at a number of different stages in the process. And the worst part about that is, many times you don't exactly know where you went wrong. Did I curdle the milk? Did I not whip the egg yolks enough with the sugar before adding it to the milk? Was my flame too hot or too low? There is so much going on at once, and so many things that could go wrong, I really needed something a bit more foolproof (heavy cream doesn't grow on trees you know...).

On a random slowish afternoon at work, my lord and saviors walked through the double glass doors dressed as a thin, hipter-ish, middle aged man and his wife. The ones that kind of remind you of your old music teachers and almost always leave a tip (people from the city - and definitely my people working at the uptown sucre know exactly what kind of people i'm talking about. Actually I bet people from certain parts of new york know what i'm talking about too...but I digress...). We started chatting about our amazing gelato and how it doesn't have eggs etc. He also turned out to be a dabbler in the homemade ice cream world as well and he suggested I try Jenni's best ice cream base, which uses cream cheese instead of eggs and a timer rather than candy thermometer (thus excluding the two things I dread about making homemade ice cream).

Obviously I went home and bought the cookbook right away. Of course I will continue to try the traditional custard based ice creams, but for now, HOLY COW this stuff is incredible! Its creamy, rich, and pretty much fool proof. You can even trade out the 3 tbs of cream cheese for marscarpone...which obviously I will be doing very very soon.... 


Homemade ice Cream Sandwiches, made with Jeni's Best Vanilla Bean Ice Cream

The "Cake-y Sandwich Part" Recipe 
which I found on this website

Ingredients 
½ cup unsalted butter, melted
½ cup granulated sugar
1 large egg
1 teaspoon vanilla extract
½ cup all purpose flour
¼ cup unsweetened cocoa powder
¼ teaspoon salt

10 x 15 inch (25 x 38 cm) rimmed baking sheet
Parchment paper

Directions
Preheat your oven to 350. In a medium sized bowl, whisk together the melted butter and sugar. 


Then whisk in the egg and vanilla. 


Then add the flour, cocoa powder and salt and mix until incorporated. (since there is no leavening agent, you can't over-mix it - refreshing, huh?) 


In you parchment lined baking sheet, pour in the batter and spread out a thin layer using a offset spatula. - If you don't have one, get one. They are super cheap and come in handy for a million different things. 

Bake for 10 minutes, rotating half way through to ensure even baking. It should be done when the cake is no longer shiny and it has begun to separate from the paper along the edges. 


Let it cool completely and then remove the parchment from the pan to cool even more. If you don't your ice cream will melt and both will be ruined! 


Vanilla Bean Ice Cream 
Ingredients
2 cups milk
4 tsp. cornstarch
1 ¼  cups heavy cream
2/3 cup sugar
2 tbsp. light corn syrup
¼ tsp. kosher salt
3 tbsp. cream cheese, softened
1 vanilla Bean, both seeds and pod, separated 

Directions
Before you start cooking, set up your stations:

(a.) In one small bowl, wisk together 1/4 cup of milk and the cornstarch

(b.) Place the 3 tablespoons of cream cheese in a bowl and set aside.

(c.) Open plastic bag with edges folded over set over a large bowl filled with ice (the ice should melt a bit during the cooking. you can add a bit of water to it later if it isn't ice bath ready by the time you are ready to cool your ice cream)

(d.) In a 4-quart sauce pan (at least - believe me I made this mistake and it was a hassle trying to switch pots in the middle of everything...pictures to follow...) Add the remaining milk, heavy cream, sugar, salt and vanilla bean and wisk together until somewhat incorporated (it should turn a very faint green - the color shows up more during the cooking process)

(e.) 4 minute timer ready to go


NOW you can start cooking (and this is actually the quick part)

1. Over medium high heat, cook the mixture until it comes to a rolling boil. Boil for exactly 4 minutes.

2. Pour in the cornstarch slurry and mix well. Bring back to a boil and cook for 2 more minutes then remove from heat. Remove the vanilla bean.

3. With your small measuring cup, scoop out about 1/4 cup or more of the hot mixture and pour into the cream cheese bowl. Mix very well and then pour it back into the main pot. Stir well until thick.

4. Pour the hot cream into the plastic bag over the ice bath. Let sit for at least 30 minutes or until completely cold. If you don't want to freeze right away, you can also put the plastic bag in your fridge for up to 3 days.

5. Freeze according to your ice cream makers instructions (I do it for about 25 minutes)


Yeah you know you want a bite....