Showing posts with label creamy. Show all posts

Wednesday, May 21, 2014

Caramelized Onion Dip


I feel like I've been talking in superlatives but this is the BEST dip ever. Like holy cow it's amazing. I've made it three times in the past month. It also was eaten so quickly I actually "had" to make it again so I could take pictures of it. The secret is in the onions. There are very few things that can compare to the deliciousness of a caramelized onion. That incredible melt it your mouth flavor is totally worth the hour it takes to make them. 

It is also officially 4 days until the end of my college career. It definitely hasn't hit me yet. Maybe it will during the 14 hour drive back to New Orleans....I also feel so unprepared. I keep forgetting I actually have to figure out how to move in to an apartment in New York. - not to mention finding an apartment in general. At least I already have roommates though...finding those would be a doozy at this point 


Caramelized Onion Dip

Ingredients 
*2 Vidalia (sweet) onions, chopped and caramelized
1 16 container of sour cream
1 container of nonfat greek yogurt
2 tablespoons light/low fat mayo
½ teaspoon onion powder
½ teaspoon of salt
¼ teaspoon pepper

*to caramelize the onions, drizzle about 2 tablespoons of olive oil in a large skillet with the chopped onions and add about 1/3 cup of water. Cook over medium low heat for about 40 minutes or until the water has evaporated, string occasionally. (during this time feel free to watch TV, take a shower, fold laundry, and check on it every now and then - thats what I do). Turn the heat up a bit and turn it every few minutes or so when the bottom onions start to change color. When the onions have dramatically reduced in size and have changed to a dark golden color, remove from the heat and let read room temperature.

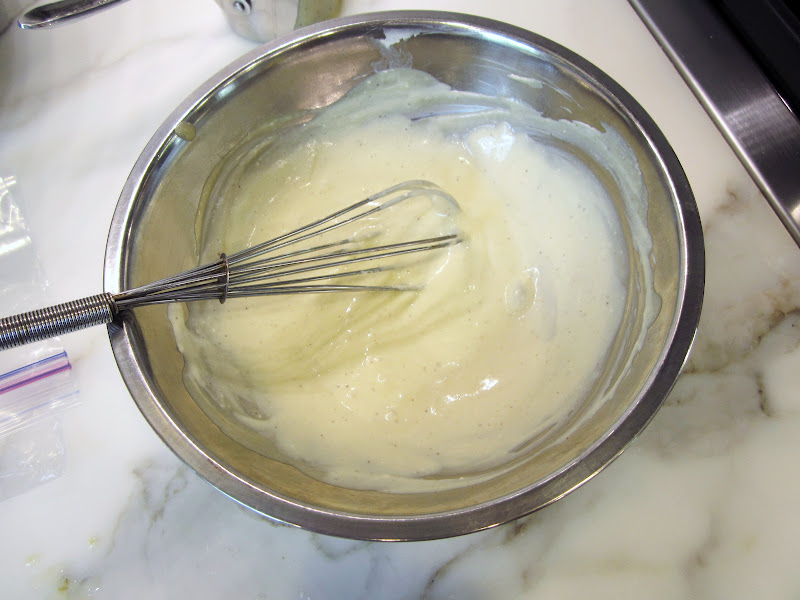
Mix all of the ingredients in a bowl and boom - you're done. Try not to eat it all at once...


Saturday, October 26, 2013

Rich Dark Chocolate Ice Cream (no eggs)


Chocolate ice cream is really difficult for some reason. When I was working at Sucre, it was always the one that had the most problems. After making it a couple of times several different ways, I understand why that was the case. Maybe it's just me, but it always seems to make the biggest mess. Actually, anything that involves melting chocolate is a mess. Probably because the chocolate gets all over your hands, which in turn gets all over everything. But store bought chocolate ice cream doesn't even come close to this stuff. It's the real deal. After I took it out of the refrigerator to pour into the ice cream maker, it looked like pudding. Actually, I bet it could have passed for pudding. Maybe I should try just putting plain ole puddin' in my ice cream maker and see what happens....If i'm lucky the low fat stuff will work so I can trick myself out of making this amazing semi-frozen sin again....


Rich Chocolate Ice Cream (no eggs)
This recipe is from Jeni's Splendid Ice Creams at Home 

Ingredients
1 cup whole milk
1 tablespoon plus 1 teaspoon cornstarch
2 ounces bittersweet chocolate 
1 ¼ cups heavy cream
1 cup evaporated milk
2/3 cup sugar
2 tablespoons light corn syrup
1/3 cup unsweetened cocoa powder
¼ teaspoon salt 

First, get everything in place before attempting to start cooking. Trying to make the slurry and prepare the ice bath etc. while trying to watch the pot is too difficult and it leaves you incredibly flustered and overwhelmed.

  • In a small bowl, whisk together two tablespoons of the milk mixture with the cornstarch and set aside. 
  • Have the chocolate (you can use disks or chopped. I used dark chocolate disks from Whole Foods)
  • Fill a large bowl with ice and set a smaller bowl on top with a plastic bag open and ready to go 
  • In the sauce pan, combine all of the ingredients, excluding the salt, before turning on the heat. (The recipe says to wait until the milk mixture is boiling before adding the cocoa, but that made a big mess when I did it and the cocoa didn't mix properly. I had to use a, immersion blender and strainer to get most of the chunks out, so I think adding it before is probably the better choice.)
Once everything is in place, NOW you can start cooking your ice cream!

  1. Bring the mixture to a rolling boil over medium high heat. Once it has reached that point, reduce the heat so the milk mixture doesn't boil over and make a huge mess. (*hint* if you put a wooden spoon on top of the pot, it prevents the mixture from boiling over. It can only work so well, though, so I ended up adding two wooden spoons towards the end.)
  2. Boil the mixture for 4 minutes. 
  3. Remove from the heat and pour in the cornstarch mixture.
  4. Bring the pot back to a boil, stirring constantly, for about a minute or until it has thickened slightly. 
  5. Remove from the heat and pour about a half a cup or so over the chocolate disks. When the chocolate is melted, pour it back into the milk mixture and whisk to combine. 
  6. Pour the ice cream into the plastic bag set over the ice bath. At this point the ice should have melted a big, but if not, you might want to add a touch of water. 
  7. Chill over the ice bath until completely cool. The plastic bag can be completely submerged into the ice bath like the book suggests, however I think its easier and cleaner to place a second bowl on top to prevent water accidentally getting into the bag and ruining the consistency of the ice cream. 
  8. Refrigerate for at least an hour or preferably over night before freezing. 


Friday, October 18, 2013

Funfetti Cake Batter Ice Cream


After making the funfetti cookies from Sally's Baking addiction, I still had leftover cake mix that needed to be used. After pilfering through a couple ideas, I decided to kinda do my own thing. Especially since I had a weird quantity leftover. I definitely could have made more cookies, but I had been wanting to make ice cream for a while anyway. I had originally planned on sticking with jeni's best ice cream base and just adding the cake mix, but about a minute into the cooking process I knew that wasn't going to work out at all. Thus, I was pretty nervous about the base. When things don't go according to plan, especially with ice cream, things can easily go wrong during the freezing process. In this case, it couldn't have been better. Holy ice cream this stuff is soo good! And super rich. If I added birthday cake remix inspired ingredients from Cold Stone to this base, this thing would be out of control. I'm definitely putting that on my to-do list for next time.


Homemade Funfetti Cake Ice Cream 
Ingredients 
2 cups whole milk
1 1/4 cups heavy whipping cream (my store stopped selling normal heavy. I'm not pleased...)
2/3 cup sugar
1 1/2 cups yellow cake mix
3 tablespoons cream cheese, room temperature

Pour the milk, cream, sugar and cake mix into a sauce pan. Have the room temperature cream cheese in a small bowl whipped with a whisk and ready to go. It's ok if the cream cheese basically gets stuck in the whisk because the hot cream will eventually get it out. Heat the milk mixture over medium heat and stir constantly for five minutes. If you stop stirring, the cake will start to cook at the bottom of the pan. When the milk is hot, pour some into the bowl of cream cheese and whisk to combine. Then pour the cream cheese mixture back into the milk. Continue stirring for about a minute or two and then remove the pot from the heat. Pour the ice cream base into a place bag in a bowl placed over an ice bath. Wait until it is completely cool before refrigerating.

Add the sprinkles a minute before the ice cream is finished 


Tuesday, August 7, 2012

Pistachio Ice Cream


For this recipe I used Jeni's best Ice cream base and then added my own pistachio paste that I ordered off of amazon. Pistachio paste is what we used at sucre to make the pistachio ice cream, so I thought buying it would be the simplest way rather than making the paste myself. It's also a lot cheaper than buying and blending them yourself, which would probably cost at least 20 big ones. I bought this one, and I also had a lot left that I can use for other things (like a chocolate pistachio tart perhaps?) I also thought it would provide the most pistachio flavor, because some recipes just soak the pistachios in the base during the cooking process and then strain them out, which doesn't leave an amazing color or texture like the paste does. I think it came out great, but it was also super rich. You couldn't eat an entire cup of this even if you tried. well...at least I couldn't...


Homemade Pistachio Ice Cream 
This recipe is pretty much the same as the vanilla bean recipe from the previous post, however in this one I added vanilla extract and pistachio paste instead. Adapted off of Jeni's best ice cream base.

Ingredients
2 cups milk
4 tsp. cornstarch
1 ¼  cups heavy cream
2/3 cup sugar
2 tbsp. light corn syrup
¼ tsp. kosher salt
3 tbsp. cream cheese, softened
¼ cup pistachio paste

Directions
Before you start cooking, set up your stations:

(a.) In one small bowl, wisk together 1/4 cup of milk and the cornstartch

(b.) Place the 3 tablespoons of cream cheese in a bowl and set aside.

(c.) Open plastic bag with edges folded over set over a large bowl filled with ice (the ice should melt a bit during the cooking. you can add a bit of water to it later if it isn't ice bath ready by the time you are ready to cool your ice cream)

(d.) In a 4-quart sauce pan (at least - believe me I made this mistake and it was a hassle trying to switch pots in the middle of everything...pictures to follow...) Add the remaining milk, heavy cream, sugar, salt and pistachio paste and wisk together until somewhat incorporated (it should turn a very faint green - the color shows up more during the cooking process)

(e.) 4 minute timer ready to go

NOW you can start cooking (and this is actually the quick part)

1. Over medium high heat, cook the mixture until it comes to a rolling boil. Boil for exactly 4 minutes.


This is when I realized my pot was too small and had to turn off the flame and switch immediately....surprised it didn't make a big difference as to the cooking process. but it did take a bit for the pot itself to get hot again

2. Pour in the cornstarch slurry and mix well. Bring back to a boil and cook for 2 more minutes then remove from heat.

3. With your small measuring cup, scoop out about 1/4 cup or more of the hot mixture and pour into the cream cheese bowl. Mix very well and then pour it back into the main pot. Stir well until thick.


4. Pour the hot cream into the plastic bag over the ice bath. Let sit for at least 30 minutes or until completely cold. If you don't want to freeze right away, you can also put the plastic bag in your fridge for up to 3 days.


5. Freeze according to your ice cream makers instructions (I do it for about 25 minutes)