Challah is a sweet egg bread that many Jewish people traditionally eat on the Sabbath and during holidays. I was raised Catholic but when I was younger I went to summer camp at the JCC (Jewish community center) where we ate challah on Fridays and learned about Jewish traditions. My step dad and his entire family are also Jewish, but i'm extremely hesitant to let them try it. They know their challah. This bread was pretty killer though, so maybe i'll let them try it round 2. Regardless of its (and my) religious affiliation, Challah is totally bangin and I would eat it every day if I could. I always thought that it tastes a lot like king cake without the cinnamon and sugar. This was also my first time making homemade bread so I was so excited when it turned out so beautifully.
Also according to wikipedia, you are traditionally supposed to make two loaves. BUT since i'm no Jew, didn't have enough flour, and don't need that much bread on my already growing hips, I decided to just make one loaf (which turned out to be quit large anyway).
I also plan to let some slices get stale because i'm pretty positive it would make an unbelievable french toast (or even bread pudding! ooohhhh - wouldn't want to compete with Sucré's bread pudding though. THAT blows my mind)
recipe inspired by allrecipes.com
Ingredients
11/4 cup luke-warm water
1 1/2 teaspoon active dry yeast
1/2 cup honey
2 tablespoons vegetable oil
2 eggs (used separately)
1 1/2 teaspoon salt
4 cups all-purpose flour
1 1/2 teaspoon active dry yeast
1/2 cup honey
2 tablespoons vegetable oil
2 eggs (used separately)
1 1/2 teaspoon salt
4 cups all-purpose flour
Directions
 1. In a microwave safe bowl, heat the water for about 20 seconds or until warm (you want the want to be warmer than room temperature but not warn enough that you would want to take a bath or go hot-tubbing in it) Mix in the dry yeast. With an electric (hand) mixer, beat in the honey, vegetable oil, 1 egg and salt. Add the flour, one cup at a time, until just combined. By the third cup switch from the hand mixer to a fork and mix until just combined. Knead the dough until it forms a ball, adding flour by the tablespoon until it’s not longer sticky. Leave the dough ball in the bowl and cover with a damp towel. Let the dough rise for at least an hour and a half.
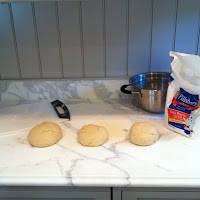
 2. When the dough has basically doubled in size, cut the ball into 3 equal parts and place them on a floured work surface. Knead each ball for 5 minutes. (use a timer – kneading the dough is very important. It helps the dough rise and prevents the bread from being tough after it has been baked)
3. Once each dough ball has been properly kneaded, roll each out into a long snake-like coil. Attach them by pinching them together that the end. Braid the dough and pinch the same way on the other side. Place the braid on a well greased (with butter) cookie sheet and cover with a towel. Let the braided bread sit to rise for at least an hour.

4. Set the oven to 375°. When the bread has finished rising, whisk the other egg and brush on top of the bread.
5. Bake the bread for about 20 to 25 minutes or until golden brown.
6. DO NOT slice the bread for at least an hour after it has been baked. This is crucial and applies to every freshly baked bread! I remember learning about it in my kitchen chemistry class – but since I got a C+ I can’t really tell you why exactly BUT I know it’s important. I think the bread becomes a crouton or something if you cut it too soon but don’t take that to the bank. I just know it’s bad so don’t do it!!


No comments:
Post a Comment