Thursday, October 31, 2013

Oatmeal Raisinet Chip Cookies


So I started making this one cookie recipe, and I just couldn't stick to it. I wanted to add more of one thing and take some things out - so basically, at least in my own head, I ultimately made up this recipe myself. And I'm going to stand by it... Because most cookie recipes have a pretty basic foundation - you have either one stick, or a stick and a half, of butter, with equal parts sugar, an egg, a cup or so of flour and so on. It's when you get to the baking soda, flour, corn starch part that is the real game changer - and the hardest part in creating a cookie recipe - that and the mix-ins obviously. Of course things change when you are making a chocolate cookie or something, but I feel like then you would potentially just replace some of the flour for cocoa powder. I have a lot to learn still, but I definitely want to trust myself more with making up my own recipes. I have enough experiences after all. It's just a matter of wasting costly ingredients that grinds my gears...

But about these cookies. I was seconds away from putting popcorn in them, because the raisinet and popcorn combo is one of my favorite indulgent snacks. I decided against it; only because I wanted to bake them the next day, and I thought the popcorn would get soggy and lose it's crunch. Actually, popcorn tends to lose it's crunch if you leave it out too long, so I was also afraid that would happen in the cookie. When I ultimately take on this challenge of putting popcorn in cookies, I think I will start with caramel corn, which locks in the crunchiness. 

Oatmeal Raisinet Chip Cookies 

Ingredients

1 stick butter
½ cup sugar
½ cup light brown sugar
1 large egg
2 teaspoons vanilla
1 cup all purpose flour
1 cup rolled oats
¼ teaspoon salt
½ teaspoon baking powder
¼ teaspoon baking soda
1 cup raisinets
½ cup semi sweet chocolate chips 


Start by creaming together the butter and sugars. If using a hand mixer, remember this part takes twice as long as using a stand mixer. If you think it's creamy enough, it probably isn't. A good indicator apart from fluffiness is the color should be come noticeably whiter.

Add the egg and vanilla and mix for a few minutes more. In a separate bowl (although not totally necessary) mix together the dry ingredients. Mix into the butter mixture until just incorporated. Fold in the chocolate chips and raisinets with a rubber spatula. Refrigerate for at least an hour.

When ready to bake, preheat the oven to 375. Do not bake immediately out of the fridge. Give the dough a bit of time to get soft again so it can spread. If you bake it immediately, the cookie doesn't spread as well, so they end up smaller and thicker. If you are into that though, go for it! Bake for 9 minutes.

**If you have time, always make one test cookie. Nothing is worse than baking half of your cookie dough or cupcake batter only to find out your oven is too hot or you cooked it for too long. More cookies do end up taking like a minute longer for some reason, but it's good to get the gist of things - and under-baking is always better than over-baking a cookie, anyway.


Wednesday, October 30, 2013

Blackberry Crumb Bars


For the first time since middle school, I haven't had a job this summer. I did have an internship at Matthew Robbins Design in New York for two months, but I have fortunately had about three weeks before and after the internship to actually relax for the first time possibly in my whole life. Since I have been in college, I actually even work during the Christmas holiday. Needless to say, my parents absolutely hate it, so these free weeks have really been great.

The best part is I get to hang out with my mom one on one a lot more. We were goofing around whole foods the other day and we found this new section they started in all the stores with the tea cookies. We couldn't resist the apricot and caramalita bars, which ultimately became the inspiration for this post. I had recently found an awesome recipe via Pinterest for blackberry crumb bars, so I thought those would be the perfect thing to make for our Wednesday night tradition. 


Blackberry Crumb Bars
Ingredients 


Topping and Crust
1 ½ cups all-purpose flour
¾ cups sugar
a pinch of salt
zest of half lemon
12 tablespoons cold, unsalted butter, cut into 12 pieces

The filling
2 large eggs
1 cup sugar
½ cup Greek yogurt (not low-fat)
¼ cup + 2 tablespoons all-purpose flour
a pinch of salt
juice of half lemon
1 teaspoons vanilla extract
16 oz. bag frozen blackberries


I found the recipe and directions here. I just used Greek yogurt instead of sour cream, which I read from other similar recipes (Too lay to type them up myself today!)


Monday, October 28, 2013

Dulce de Leche filled Chocolate Cupcakes with Fluffy Dulce de Leche Icing


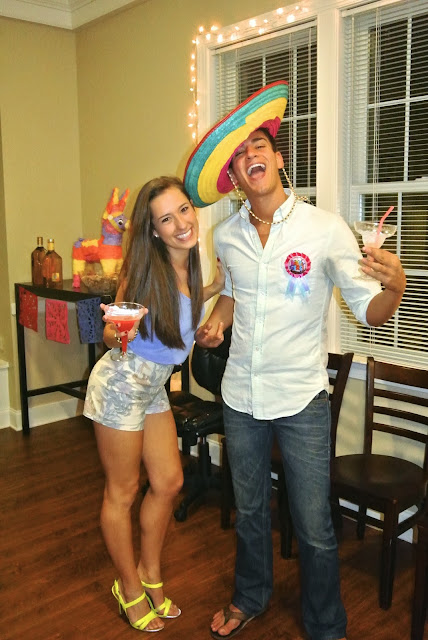
For my roommates, Mike's, 22nd birthday my other three roommates and I threw him a Cinco de Mike-O themed party at our apartment. I made 2 kinds of salsa, guac, quesco, chocolate churro puppy chow (muddy buddies) and Dulce de Leche filled Chocolate cupcakes with Fluffy Dulce de Leche Icing. I had so much fun cooking and decorating. It was like a dream come true. Finally I could put some of my Pinterest knowledge/ hours of "research" into action. I got a lot of my goods from the dollar tree and worked with some things I already had on hand as well - like terra-cotta pots to hold the guac, martini glasses, and this rug thing that works for Mexican costumes (not totally sure what they are called...)

(also I know the pictures aren't amazing...it was at such an awkward time of day, and that really makes all the difference in the world when it comes to pictures of food etc.)

The only part of this recipe that I actually made up was the icing. Because Dulce de Leche is so thick, I wanted something to contrast with that so the cupcake wouldn't be too heavy. The frosting was light and fluffy, while still having a strong enough dulce de leche flavor. I couldn't stop licking the bowl. I had some left over and it actually pained me to throw it out. But of course, it had to be done. 

I used my favorite cake recipe for the cupcakes and I followed several websites like this one to learn how to boil the can of condensed milk to make dulce de leche (it really is that easy!) - hint though, just don't open the can until it is COMPLETELY cool. I was too excited and mine exploded....


Fluffy Dulce de Leche Icing 
1 package of cream cheese, room temperature 
1 small container heavy whipping cream
leftover dulce de leche from the sweetened condensed milk can (whatever I didn't use to fill the cupcakes. I'd say it was about a 1/2 can) 
2 cups confectioners sugar

In a separate bowl, beat the heavy whipping cream until stiff peaks form (either by hand or using a mixer - In this case I use the mixer because even if you do over-beat it and it curdles slightly, no one will be able to tell once it is incorporated).

In a larger bowl, cream together the cream cheese and sugar. Then add the dulce de leche.

Using a spatula, gently fold in the whipped cream


The hanging decorations were made out of tissue paper I bought at the dollar tree and thin string I got from Walmart. I cup out each one like a snowflake. Overall, this part cost $1.30. If you buy them online, they can be $10+ - not bad, right?


When a piñata  poops, dulce de Leche filled Chocolate Cupcakes come out


Saturday, October 26, 2013

Rich Dark Chocolate Ice Cream (no eggs)


Chocolate ice cream is really difficult for some reason. When I was working at Sucre, it was always the one that had the most problems. After making it a couple of times several different ways, I understand why that was the case. Maybe it's just me, but it always seems to make the biggest mess. Actually, anything that involves melting chocolate is a mess. Probably because the chocolate gets all over your hands, which in turn gets all over everything. But store bought chocolate ice cream doesn't even come close to this stuff. It's the real deal. After I took it out of the refrigerator to pour into the ice cream maker, it looked like pudding. Actually, I bet it could have passed for pudding. Maybe I should try just putting plain ole puddin' in my ice cream maker and see what happens....If i'm lucky the low fat stuff will work so I can trick myself out of making this amazing semi-frozen sin again....


Rich Chocolate Ice Cream (no eggs)
This recipe is from Jeni's Splendid Ice Creams at Home 

Ingredients
1 cup whole milk
1 tablespoon plus 1 teaspoon cornstarch
2 ounces bittersweet chocolate 
1 ¼ cups heavy cream
1 cup evaporated milk
2/3 cup sugar
2 tablespoons light corn syrup
1/3 cup unsweetened cocoa powder
¼ teaspoon salt 

First, get everything in place before attempting to start cooking. Trying to make the slurry and prepare the ice bath etc. while trying to watch the pot is too difficult and it leaves you incredibly flustered and overwhelmed.

  • In a small bowl, whisk together two tablespoons of the milk mixture with the cornstarch and set aside. 
  • Have the chocolate (you can use disks or chopped. I used dark chocolate disks from Whole Foods)
  • Fill a large bowl with ice and set a smaller bowl on top with a plastic bag open and ready to go 
  • In the sauce pan, combine all of the ingredients, excluding the salt, before turning on the heat. (The recipe says to wait until the milk mixture is boiling before adding the cocoa, but that made a big mess when I did it and the cocoa didn't mix properly. I had to use a, immersion blender and strainer to get most of the chunks out, so I think adding it before is probably the better choice.)
Once everything is in place, NOW you can start cooking your ice cream!

  1. Bring the mixture to a rolling boil over medium high heat. Once it has reached that point, reduce the heat so the milk mixture doesn't boil over and make a huge mess. (*hint* if you put a wooden spoon on top of the pot, it prevents the mixture from boiling over. It can only work so well, though, so I ended up adding two wooden spoons towards the end.)
  2. Boil the mixture for 4 minutes. 
  3. Remove from the heat and pour in the cornstarch mixture.
  4. Bring the pot back to a boil, stirring constantly, for about a minute or until it has thickened slightly. 
  5. Remove from the heat and pour about a half a cup or so over the chocolate disks. When the chocolate is melted, pour it back into the milk mixture and whisk to combine. 
  6. Pour the ice cream into the plastic bag set over the ice bath. At this point the ice should have melted a big, but if not, you might want to add a touch of water. 
  7. Chill over the ice bath until completely cool. The plastic bag can be completely submerged into the ice bath like the book suggests, however I think its easier and cleaner to place a second bowl on top to prevent water accidentally getting into the bag and ruining the consistency of the ice cream. 
  8. Refrigerate for at least an hour or preferably over night before freezing. 


Sunday, October 20, 2013

Chewy Double Chocolate Chip Cookies


My stepmom, Stephanie, and my little brothers, Blake and Chase, ask me to bake a certain chocolate chocolate cookie recipe ever since I made them years ago. The problem is, I always have to hunt down the recipe. Especially since Martha Stewarts website is in beta right now, it was such a pain trying to find the exact ones. I found this recipe, which I thought could possibly be the one. Deep down I knew it wasn't the right one, but I was too lazy to keep looking. And there is nothing wrong with adding another recipe my repertoire, either. These don't have the sinful, brownie-like, over the top decadence like the others, but that doesn't mean they aren't delicious! These are chewy, and resemble the texture of a sugar cookie  in opinion. They also spread out a lot, whereas the others barely spread out at all. I even did the cookie dough tower method, and it didn't make a difference. These would make IDEAL ice cream sandwich cookies I bet...yum. Definitely trying that next time.


Chewy Double Chocolate Chip Cookies

Ingredients 

1 cup all purpose four 
½ cup unsweetened cocoa powder
½ teaspoon baking soda
½ teaspoon salt 
4 ounces coarsely chopped milk chocolate (for melting)
½ cup semisweet chocolate chips (I used Ghirardelli)
½ milk chocolate chips
1 stick (1/2 cup) unsalted bitter
1 ½ cups sugar
2 eggs
1 teaspoon vanilla extract

Whisk together dry ingredients in medium sized bowl and set it aside.

In a double boiler or glass bowl set atop a pot of simmering water, melt the butter and chocolate.

Pour the chocolate into a large mixing bowl or mixer set with a paddle attachment. Add the sugar, eggs, and vanilla and mix until combined.

On low speed, mix in the flour mixture until just combined. Fold in the chocolate chips. Refrigerate for at least an hour (doing this prevents too much spreading and makes it easier to scoop and shape the dough)

When ready to bake, preheat the oven to 325 and bake for about 15 minutes. Note you might want to space out your cookies slightly more than usual because these tend to spread out. I used the baking tall method, but they still spread out regardless. However, doing so might prevent too much spreading. (If you do bake tall, I used a melon baller instead of a normal ice cream/cookie scoop)