Showing posts with label chocolate chip. Show all posts

Monday, February 10, 2014

S'mores Chocolate Chip Cookies


I made these a while ago, but I had to space out my cookie posts a little before it started to look like i'm cookie obsessed. I am of course, but I needed to mix it up a little. Also don't think I ate all of these by myself. I mean I ate A LOT of them don't get me wrong but I had to bring them to class as a part of my research. Although I recently discovered that it was a HUGE waste of my time. Never had to do that. Got really sick the day of our huge final presentation and my group BOMBED because I wasn't there. Like actually tanked. While dying in my bed that morning I got texts from people in my class about how terrible it was. Great day. Great class. JUST. FAB. and Ultimately I got a B+ in the class. I don't think I will stop being bitter about this for a long long time. Especially because we had no tests or assignments or grades all semester...anyway, too the recipe --> 


S'Mores Cookies 
I used a recipe I found via a blog called Baked by Rachel 

Ingredients 
10 tablespoons of unsalted butter, room temperature
½ cup plus 2 Tbsp. brown sugar
½ cup plus 1 Tbsp. granulated sugar
1 egg, room temperature
1 tsp. vanilla
1 cup cake flour
¾ cup bread flour
½ tsp. plus 1/8 tsp. baking soda
¾ tsp. baking powder
¾ tsp. salt
1 ½ cups chocolate chips or (1 cup mini Hershey’s chocolate kisses as per the recipe)
½ cup crushed graham crackers (make sure to leave in some in chunks - it shouldn't be a powder)

1 cup mini marshmallows

Directions 
In a separate, medium sized bowl, mix together all of the dry ingredients (flours, baking soda, baking powder, salt)

Cream the butter and sugars until light and fluffy

Add egg and vanilla and mix for a minute more 

In two or three intervals, add the dry ingredients to the butter mixture. Then fold in the chocolate chips, graham crackers and marshmallows. 

Refrigerate for 24 hours or over night. When ready to bake, preheat the oven to 350 and bake for 12-14 minutes or until the edges are golden brown. 

Best served warm and gooey! (you wouldn't eat a cold s'more, right?...then it's just what...like a moon pie or something...)


Monday, November 4, 2013

Salted Nutella Stuffed Browned Butter Chocolate Chip Cookies

Salted Nutella Stuffed Browned Butter Chocolate Chip Cookies Recipe and directions from Ambitious Kitchen, found here 

Ingredients
2 ¼ cup all-purpose flour
1 ¼ teaspoons baking soda
¼ teaspoon of salt
2 sticks (1 cup) unsalted butter (browned and set at room temperature)
1 ¼ cup packed dark brown sugar
¼ cup granulated sugar
1 large egg plus 1 egg yolk
1 ½ teaspoons vanilla extract
1 tablespoon plain Greek yogurt
¾ cup semi-sweet chocolate chips
½ cup milk chocolate chips
½ cup dark chocolate chips
1 jar of Nutella, chilled in refrigerator
Fleur de Sel or course sea salt for sprinkling

**Helpful links for how to brown butter found here and here. Make sure to let it get room temperature though. It doesn't specify in the original recipe but when I made browned butter cupcakes with the hot butter, they turned out incredibly dense. Cookies and cupcakes are very different, but I still didn't want to make the same mistake twice - so exercise caution. 


Thursday, October 31, 2013

Oatmeal Raisinet Chip Cookies


So I started making this one cookie recipe, and I just couldn't stick to it. I wanted to add more of one thing and take some things out - so basically, at least in my own head, I ultimately made up this recipe myself. And I'm going to stand by it... Because most cookie recipes have a pretty basic foundation - you have either one stick, or a stick and a half, of butter, with equal parts sugar, an egg, a cup or so of flour and so on. It's when you get to the baking soda, flour, corn starch part that is the real game changer - and the hardest part in creating a cookie recipe - that and the mix-ins obviously. Of course things change when you are making a chocolate cookie or something, but I feel like then you would potentially just replace some of the flour for cocoa powder. I have a lot to learn still, but I definitely want to trust myself more with making up my own recipes. I have enough experiences after all. It's just a matter of wasting costly ingredients that grinds my gears...

But about these cookies. I was seconds away from putting popcorn in them, because the raisinet and popcorn combo is one of my favorite indulgent snacks. I decided against it; only because I wanted to bake them the next day, and I thought the popcorn would get soggy and lose it's crunch. Actually, popcorn tends to lose it's crunch if you leave it out too long, so I was also afraid that would happen in the cookie. When I ultimately take on this challenge of putting popcorn in cookies, I think I will start with caramel corn, which locks in the crunchiness. 

Oatmeal Raisinet Chip Cookies 

Ingredients

1 stick butter
½ cup sugar
½ cup light brown sugar
1 large egg
2 teaspoons vanilla
1 cup all purpose flour
1 cup rolled oats
¼ teaspoon salt
½ teaspoon baking powder
¼ teaspoon baking soda
1 cup raisinets
½ cup semi sweet chocolate chips 


Start by creaming together the butter and sugars. If using a hand mixer, remember this part takes twice as long as using a stand mixer. If you think it's creamy enough, it probably isn't. A good indicator apart from fluffiness is the color should be come noticeably whiter.

Add the egg and vanilla and mix for a few minutes more. In a separate bowl (although not totally necessary) mix together the dry ingredients. Mix into the butter mixture until just incorporated. Fold in the chocolate chips and raisinets with a rubber spatula. Refrigerate for at least an hour.

When ready to bake, preheat the oven to 375. Do not bake immediately out of the fridge. Give the dough a bit of time to get soft again so it can spread. If you bake it immediately, the cookie doesn't spread as well, so they end up smaller and thicker. If you are into that though, go for it! Bake for 9 minutes.

**If you have time, always make one test cookie. Nothing is worse than baking half of your cookie dough or cupcake batter only to find out your oven is too hot or you cooked it for too long. More cookies do end up taking like a minute longer for some reason, but it's good to get the gist of things - and under-baking is always better than over-baking a cookie, anyway.


Sunday, August 28, 2011

NY Times Chocolate Chip Cookies


According to the New York Times as well as countless posts on food gawker, this is apparently the best chocolate chip cookie recipe out there. Not gonna lie, they are definitely delicious. I don't think I like them more than the Neiman Marcus cookies, but they are less effort (and not to mention much cheaper to make - ergo you don't need a coffee grinder, oatmeal or two 8 ounce bars of chocolate. Believe be, it adds up).  The only flaw is that you have to wait at least 24 hours before you bake them. Can you imagine the anticipation? I've been waiting a long time for the perfect occasion to make them and this weekend was the perfect opportunity. Since I got here a few days before my roommate, I made the dough the day before Courtney and her family got here so I had an excuse to not bake them right away.


So I literally copy and pasted the recipe from this blog called One Lovely Life which I found via foodgawker. Don't be mad One Lovely Life! I'll put it in quotations. gotta keep it MLA style (minus the citation cause that's too much effort) - I am still in college...Although she said it was adapted from the original.. I looked at the original. Still haven't found the adapted part....oh well!

"Ingredients:
2 1/2 sticks (1 1/4c) butter, softened
1 1/4c brown sugar
1c sugar
2 eggs
2 tsp vanilla
1 3/4tsp salt
1 1/2tsp baking powder
1 1/4tsp baking soda
2c minus 2 Tbsp cake flour
1 2/3c bread flour
20oz (3 1/3c) semi-sweet chocolate chips

Directions:
1. In a large bowl, cream butter and sugars until light and fluffy (about 4-5 minutes). Beat in eggs, one at a time until well incorporated. Stir in vanilla.

2. Sift in salt, baking powder, baking soda, cake flour, and bread flour. Stir until dry ingredients are well incorporated. Fold in chocolate chips.

3. Press plastic wrap against the surface of the dough and refrigerate dough at least 24 hours (dough can remain refrigerated up to 72 hours).

4. When ready to bake cookies, scoop golfball-sized balls of dough onto a cookie sheet lined with parchment or a silicone mat. Bake 6 cookies at a time at 350 degrees for 10-11 minutes, or until edges are golden but centers are still slightly gooey. Allow cookies to rest on the warm baking sheet about 5 minutes before moving to a cooling rack (this will allow the heat from the pan to finish cooking the centers).

Makes about 3 dozen cookies."

 Yes, I am posting on my food blog and watching the vma's alone while my roommate goes out and has a good time. But it's a sunday and I am le tired, aight? My wild side will come out. you'll see.... Bella and I also discovered tonight after we decided we were too lazy to go out that my pajama shorts have quite a few tears on the back exposing a large portion of my left cheek. Why I didn't feel a draft i'll never know. However it does explain why the boy in the elevator gave me that funny look when I was walking back to my apartment. your welcome hun. These shows aren't always free. And if you were wondering, no I am not throwing them away. far too soft for that.

Thursday, June 30, 2011

Cowboy Cookies


I stumbled upon this recipe for cowboy cookies via stumble upon months ago and have been dying to try them ever since. I love anything that is both salty and sweet so the concept of putting pretzel bits into a cookie just sounded  brilliant to me. They turned out to be pretty darn  good, but not the best i've ever had. However in the recipe's defense, my mom and I both decided that they cannot be compared to my all-time favorite chocolate chip cookie recipe - from the infamous Neiman Marcus scandal (which I will post eventually) - because they are in totally different leagues. For one, this cookie has pretzels in it, which in my opinion makes it more of a day time snack-like cookie versus a more decadent dessert cookie (like the NM' s). They are chewy and chocolaty, and the pretzel adds a unique texture that is somewhat salty but not at all overpowering.  


This recipe is based off of one I got from a blog called My Baking Heart which was ultimately inspired by the book entitled Baked Explorations 

Ingredients 
1-3/4 c all-purpose flour
1 tsp baking soda
1 tsp baking powder
1/2 tsp salt
2 c rolled oats
14 tbsp (which means 2 sticks minus 2 tablespoons) of unsalted butter
3/4 c granulated sugar
1 c dark brown sugar, firmly packed
1 lg egg
1 lg egg yolk
1 tsp pure vanilla extract
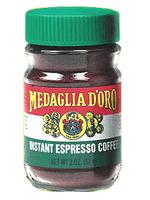
1 tsp espresso powder - also called instant espresso coffee (found in the instant coffee section NOT the baking section. make sure to ask for help before you completely give up. It can be found in your regular grocery store but don't bother looking at whole foods they don't have it.)
2 c semisweet chocolate chips (which is one regular sized bag)
3/4 c thin salty pretzels, broken into tiny pieces but not crushed into dust

1. Set the oven to 350. In a large bowl, blend the butter and sugars until light and fluffy. then add the eggs and beat until even lighter and fluffier.

2. beat in the vanilla until just combined. *remember to scrape down the sides of the bowl between each step

3. microwave 1/4 of a cup of water for about 35-40 seconds and stir in the espresso powder until it has completely dissolved.

4. Combine the dry ingredients in a separate bowl (flour, baking powder, baking soda and salt). In a coffee grinder, blend 1 cup of the rolled oats. Then partially blend 1/4 of a cup and do not blend the remaining 1/4 cup of oats. This is not required but I personally am not wild about the texture that oats give a cookie (although I love the flavor) If you do blend the oats it gives the cookie a nice chewy texture which I personally enjoy. Add all of the dry ingredients together and stir until they are pretty well combined.

5. Starting with the dry ingredients (ALWAYS start and end with dry) rotate blending the wet espresso mixture and dry (about 2 or 3 times each). This way you have the most control over the consistency of the cookie and are less likely to get a clumpy or runny dough.

6. Add the chocolate chips and then add the pretzels. (If you aren't baking all of your cookies at once, I suggest you leave the pretzels out until it's time for baking so they stay fresh and crunchy. if you leave them in the dough over night the pretzels tend to soften)

7. Cover with plastic wrap and refrigerate for at least 2 hours.

8. Roll about 1 1/2 to 2 tablespoon sized balls of dough and slightly flatten them so they look like fat disks. Leave about 3 inches of space between each cookie. Bake for 12 minutes (11-13) or until golden brown.

Monday, May 30, 2011

Chocolate Chip Scones


At breakfast, bakeries and coffee shops, scones are kind of the underdog. Usually passed up for a muffin a or bagel, the lonely scone sits in that glass case rejected and under appreciated. Because I have never made scones before (and am also guilty of favoring the cliche muffin or bagel) I decided to give it a try. I had only had about two scones in my life, the first made fresh at an adorable little tea and sandwich shop by my old boarding school and the second before accounting class when they had run out of everything else (go figure). I've been trying to bake entirely new and different things for a change, so I thought scones would be a perfect place to start.They are actually pretty simple but do take a little time if you don't have fancy pastry-making equipment (like myself). I did my research and used a compilation of different recipes and techniques to come up with my own.


Ingredients
2 cups all purpose flour
1 teaspoon baking powder
1/4 teaspoon baking soda
1/3 cup of sugar, plus about 2 tablespoons 
1/2 teaspoon salt
8 tablespoons unsalted butter, frozen and cubed
1/2 cup sour cream
1 large egg
2 cups semisweet chocolate chips
about 2 tablespoons of milk (whole is best but 2% will suffice) 

Directions
Preheat the oven to 400°

You should have two bowls: one large and one small-ish/medium. The large bowl is for your dry ingredients and the smaller bowl is for your wet ingredients. 

In the large bowl, combine the flour, sugar, baking soda, baking powder and salt. Stir the dry ingredients so they are all pretty well combined. Then add the frozen cubes of butter, making sure the butter does not stick to itself. With two knives (unless you have a pastry blender) "cut the butter" into the dry flour mixture. To do this, hold a knife in each hand and cut across the bowl so the knives form an "x". Continue to do this until the butter is well incorporated and looks like course crumbs. This actually takes a while so don't try and rush through it.

Add the chocolate chips to the dry mixture

In the smaller bowl, whisk together the sour cream and egg. Make a crater in the center of the dry ingredients and pour in the wet sour cream mixture. Use a fork to mix the wet and dry together, then your hands to completely combine all of the ingredients. Don't over mix! 

Flour a dry surface and knead the dough 4 or 5 times. Then press the dough into about a 6 inch or so circle. It should look like a giant cookie. With a knife, cut the dough into 8 pizza looking slices.
Place the scone slices on a greased cookie sheet about 2 inches apart. Brush milk on top of each scone and sprinkle (regular white!) sugar on top. Bake for 15-17 minutes (I baked for 16). 

When the scone are fresh out of the oven, sprinkle a liberal amount of sugar on top of each scone so the sugar sticks. If you wait too long the sugar will not stick to the top of the scones. Serve immediately!Store in an airtight container. If eaten the next day, microwave for about 25 seconds.

I wanted to try two different techniques on this one recipe because I thought the first ones I made didn't look golden enough. After I took the scones out of the oven, I took a couple of them and brushed more milk on top and sprinkled them with brown sugar (instead of regular white). I popped then back into the oven for about 3 or 4 minutes. I decided this was completely unnecessary. 16 minutes was perfect and the brown sugar didn't make them taste or look any better. They weren't terrible or burnt, but they just weren't as good as the first. 

this recipe was inspired by Joy of Baking and Allrecipes.com